
I am on the board for our local Baptist assisted living and nursing home, Riverview Estates. As such, I try to be involved in the life of the community there 1. This week my involvement down at the home helped me practice some Lightroom skills.
Riverview has a mural painted in it’s Administrative hallway which has been around from time immemorial. It was slated to be covered with paint as part of renovations, but resident objections have changed plans 2. Now the goal is to preserve it, so I offered one option. I could capture the mural in a number of photos and stitch them together as a panorama. This panorama could be printed on canvas and re-hung in place, should the mural not be salvageable in its current form.
So I headed down to the home with a tripod and my new 18-105mm lens 3 to capture the mural in all it’s glory. I tried two different methods. I first kept the tripod in place and pivoted the head. I didn’t like the results from that set so I took a second series where I slid the tripod along the hallway. This kept the angle of the camera consistent throughout.

The result looked pretty good.

I wasn’t able to set up lights for my shoot 4, so I was at the mercy of the light fixtures in the hallway. This left a deep shadow about a third of the way into the image. This was not acceptable, and there was only so much I could do adjusting the highlights and shadows of the entire image. The differences were too great.
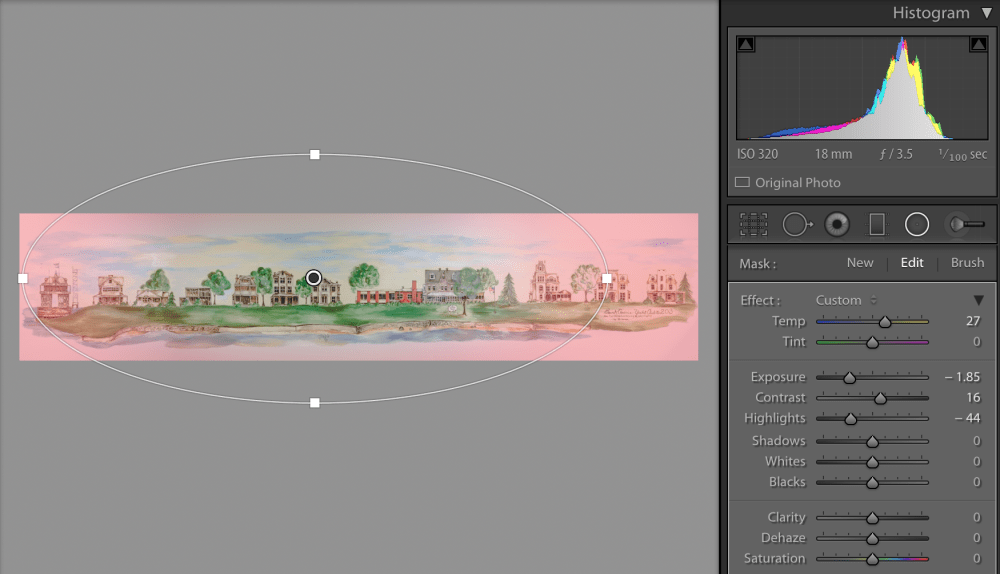
To rectify this problem I applied an elliptical mask which covered the area in shadow. I then reduced the exposure of the unmasked portions of the photos, which resulted in a much smoother result. If I was a bit more skilled with Lightroom I’m sure I could produce even better results, but I was pleased with what I was able to achieve.

The tint was a bit off on the right side of the panorama, so I applied a gradient filter and altered the color temperature of that portion of the image.
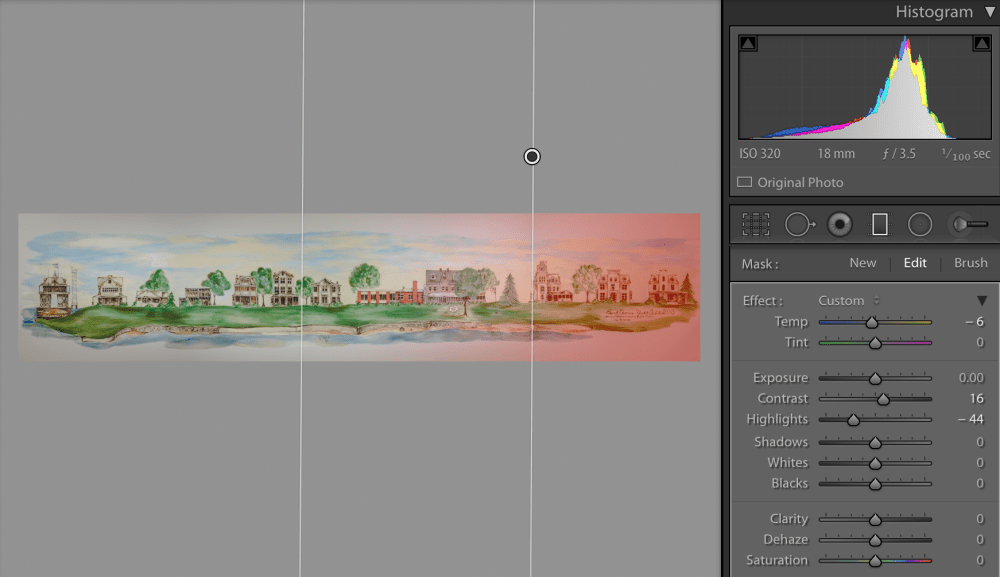
This left me with the final result. I am pleased!

Discover more from Painfully Hopeful
Subscribe to get the latest posts sent to your email.

The last exposure is my favorite .Youu are so good at photography. I love your work. Sent from my iPad
>